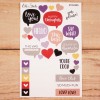
The March 2017 Digital Kit from Ali Edwards is full of fresh, Springtime inspiration. I created two projects with it, one of which is 100% digital. That's something I haven't done in ages and I kind of really liked it!
I resized a digital card to 8.5"x11", added a photo + some text and called it good to go. Love how simple it was and it has a very editorial vibe to it, which I love.
I also created Week 07 of my Project Life® album (I'll show you Week 06 next week!) and I have a full video tutorial on how I created the digital elements and then the physical assembly of the spread.
This week, my friend and I went to Midway (a quaint little mountain town) for a couple of days, so I included a 3"x8" insert for more photos. I really wanted a 6x8 full size photo as well.
I added a lot of text + digital elements right on my photos and you can see all the ins and outs of that in the process video. :) Here are a few detail shots...
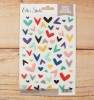
I added stapled puffy hearts from Freckled Fawn throughout the spread. It's really the only embellishment and I like keeping it simple.
Take a peek at the video to see how I created the shaped text on my large photo and how I added the other digital elements to my cards. You can find this awesome kit in Ali's shop here. I've linked to all other available products below.
So many exciting things are happening for Elle's Studio this month and that means that I have lots of fun products and a few projects to share with you!
This kit is filled with gorgeous greens and yellows - perfect for spring! I am really really loving this color scheme. The coordinating extras are some of my faves ever...
I created two projects using these releases. First up, a traditional layout where I combined two 3x4 cards and a 4x6 card to create a large photo mat.
I used the puffy stickers + the words already printed on the card for my title and I decided to tuck my photo in by trimming around some of the ascending letters. I trimmed around the cloud on the top card as well. Simple layout, but I love how it turned out!
I also created my Project Life® Week 05 spread using this kit as well as the TV and Feel Better mini kits that were released last month.
Hope these projects have inspired you and that you'll check out the amazing products over in the Elle's Studio shop! If you want a closer look, check out my kit unboxing video below. I'm also showing you the new Birthday Mini Kit, which is now available!
I'll be sharing a process video later this month on my YouTube channel using more of these cute releases, so be sure to head over to my channel and subscribe if you haven't already!
Hey friends! As promised, I'm back with another way I used the Ali Edwards February 2017 Digital Kit in my memory keeping this month. I am still keeping up with my Project Life® 6x8 album and included elements from the digital kit on two of my cards for my Week 04 spread.
This week was Malia's birthday, so most of the cards actually have to do with activities related to celebrating her. I included a little paper bag (which was a favor from her party) that I decorated with some awesome stamps from Kelly Purkey.
On the back of the bag I added some journaling, a chipboard piece (from the Surprise Story Kit™) and some transparent numbers (from the Numbers Story Kit™).
Because I'm working with very few pockets, I'm finding that I like to include the photo + story on a single card quite often. This card is from the February Digital Kit and I added my photo and journaling in Photoshop before I printed it.
Another thing I'm loving is the mix of handwriting + printed words. I added the word "Loving" from the digital stamps to my photo before printing, then used my white gelly roll pen to add a bit more. This simple card is probably my fave from the week.
You can watch the entire spread come together in my process video below!
I've linked to Ali's products throughout the post and all other available products below. Thanks so much for stopping by!
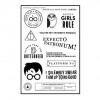
Well, we are nearly three weeks into 2017. Wow. I decided to start Project Life® again this year in a 6x8 format and I think I'm going to love it. The cover page is a beautiful combination of digital stamps from Ali Edwards (January Digital Kit + Twenty Seventeen Word Art) and an acrylic piece from Elle's Studio.
I am taking a weekly approach and I plan to keep it very simple. Mostly words + photos. And it's just going to be a broad overview of the week. Not necessarily a photo a day. It matters so much more to me to get the stories told than to make it pretty or all-inclusive. I want to stay on top of this project. And I'm happy to say that I already finished Week 02!
I plan to incorporate some full page photos and Week 01 started it off. I used some stickers from past Ali Edwards Story Kits™ and wrote some journaling directly on the photo. I also included a little 4x6 card as an insert that I received as a thank you from Ali for being a part of her team last year.
I backed that card with a 4x6 photo. I added some word art from the Ali Edwards January 2017 Digital Kit before I printed it, added some journaling with a white gelly roll pen and a chipboard sticker from the Tough Story Kit™.
I included two photos that epitomized our week (Wii and basketball), added dates, a few word stickers and a journaling card (all from Ali Edwards Story Kits™) with more details from the week. I think it was a good way to include details without more photos.
Another thing I can see myself doing a lot with this project is including journaling directly on my photos. Here, I added a white bar along the bottom of my photo in Photoshop, added my journaling and some AE word art, then printed it out.
If you want to see the whole thing come together, I made a little process video and you can watch it below.
I've linked to all available products below (except for AE products, which are linked throughout the post). Thanks so much for stopping by!
On March 29, 2016 I decided to document a day in our life along with Ali Edwards. Earlier this week, I finished the project and I am so happy with the way it came together. I used very few supplies (pictured below - this was a quick iPhone pic, so quality is not great) and I found that it was a good way to keep the project from becoming overwhelming.
I created a series of 6x12 pages, some whole and some divided pocket pages (I used Becky Higgins Design H page protectors). I chose a really "everyday" kind of photo for my cover page and added digital word art from Ali Edwards "This is Us" digital brush set to my photo and cropped it to 6x12 in Photoshop before sending it (and several other photos) to Persnickety Prints.
You'll notice that I also added a chipboard circle from the Ali Edwards Day in the Life Mini Kit to each page. I wanted a bit of consistency amidst the chaos of a million photos. :)
I used the 4x6 cards in the DITL kit for journaling, but I also added a few in the "white space" of some of my 6x12 photos, like the one pictured below. I added a little strip of washi tape to the bottom of the card as well.
Another way I kept things consistent was by using the Day in the Life 4x6 layered templates. It had a space to put the time (using the freaking awesome roller time stamp from the DITL mini kit) and I love that when you look at each page, you almost see the time first and then you get to dive into the photos and story a bit.
Here you can see the same formula. I used the Hard Stuff/Easy Stuff card for my captions and I did sort my photos into hard and easy things, but it's very tongue in cheek and not very serious. This layout is also where I ended up adding some of the wood words left over from my Craft Story Kit.
You'll notice that I stamped the date on each photo and then stamped it again with a caption on each 4x6 card. It was a really easy way to tell the story of the day and again, keep things consistent.
In this spread, I wrote directly on a few photos, and I used an Extra Fine Sharpie for that. I switched things up a little to accommodate some vertical photos, but you can see that it still has the same feel.
This layout has fewer photos and I took the opportunity to draw attention to the fact that I have to ask my daughter to put her school things away several times before she actually does it. I stamped the times consecutively and included the same caption, 03:38 PM - I tell Mal to put her stuff where it belongs, several times.
On the left side, I cut up a 3x4 card and put it below my journaling. I like the way the boldness of the black draws your attention, but doesn't cover up as much of the photo as the 3x4 card would have. Also, still sticking to the chipboard circles.
On this layout I added a 4x6 card left over from my Tough Story Kit to the bottom of my 6x12 photo (love that photo!). The right side turns back to the formula from the first few pages with a 4x6 card for journaling and photos with time stamps on the rest of it.
This 4x6 card was actually the back of blueish green "Today is a Brand New Day" card that I used earlier in the day, so I took advantage of the digital kit and printed one of my own. Super easy. Again, just stamping the time + caption for each photo.
And here we come to the final page documenting our evening. I had a little bit of a conundrum with my final photo - I used a White Gelly Roll pen to write on my photo, which is great, but I didn't do that anywhere else and that kind of bugs me. I'm leaving it for now...
And that's my entire day documented! This will live in my album along with my regular pages and I'm really happy with the way it turned out. I'm actually really looking forward to documenting a whole week in our lives in May using Ali's Week in the Life kit (I got the grey "Stories" album)! There are still some available in Ali's shop if you are interested.
If you've made it all the way through this blog post and want to hear me talk about these pages even more, I have a little share video, which you can watch below.
Thanks so much for stopping by and spending some time with me!