Hello again! Today I have a few projects that came together very easily using the Ali Edwards July Digital kit . I love these products that prompt stories and make documenting my life fun and easy!
I'm trying to catch up on my 6x8 Project Life album and used a few of the digital cards and stamps to help me make it easy here. I'll have a video showing you the process on this one in the next few days!
This was the week I hit 10,000 subscribers on YouTube and I definitely wanted to document that! Don't forget to include screenshots and other "life stuff" that might not have a typical photo.
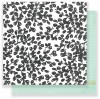
I added a few physical embellishments from Elle's Studio and past AE Story Kits™. Simple and done. Love that.
I usually like to dedicate at least one card to journaling, but I have no problem writing directly on the photos if I have more to say.
There were lots of summery, vacation elements in this month's kit, so I decided to do a little page about my recent trip to Oregon. I went for Ali's Story Camp, but brought my bestie with me and took her to some of my favorite places on the coast for a few days!
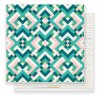
I traced one of the journal cards in Silhouette Studio to make a cut file and cut it out several times diagonally in the top corner of my 8.5x11 page.
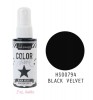
I added my photo, embellishments, journaling, and stamping on the diagonal as well and kept this one super simple.
If you're interested in this fun July kit, you can check it out in Ali's shop here!
Thanks so much for stopping by and check my YouTube channel for a hybrid process video on my PL spread in the next few days!
Showing posts with label hybrid scrapbooking. Show all posts
Saturday, July 15, 2017
Monday, May 15, 2017
AE Digital Projects | May 2017
For some reason May always seems to be one of the busiest months for me. So glad I was able whip out a couple of simple, story-filled, hybrid layouts in under an hour using some of the Ali Edwards May digital releases.
The first uses the May Digital kit and I was so excited to see a bit of a self-care theme running throughout the cards and stamps. I've been walking almost every day since it's been warm enough outside and it has been a true escape for me. I can think, or clear my head. I notice the beautiful things around me. It's good for me too. Based on my shoes it's obvious I'm not doing this for cardio but it's the best thing I can do for myself right now and I'm loving it.
I printed my photo at 6x8, but before I did, I added a digital stamp and some journaling in Photoshop.
I gave my photo a white border, trimmed my patterned paper down to 6x8 and added a date, a chipboard circle from a past Story Kit™ and a few florals from Maggie Holmes.
One down.
The next layout uses the new Pets Digital stamps. I had to tell the story of my finding out my boy kitten was a girl and that she got knocked up. Haha.
Again, super simple, but the story got told. I created an 8.5x11 canvas in Photoshop, used a digital stamp for my title (I added the color using the paint bucket tool), added my journaling to the bottom and printed it out on white cardstock.
I printed my photos in black and white at 4x4, added a strip of patterned paper and a chipboard circle (again, from a past Story Kit™) and called it finished.
I seriously love the layouts these products inspire me to create and I'm grateful to be on Ali's design team because it gives me a gentle push to tell stories that matter.
You can find these products on Ali's website here.
Tuesday, April 25, 2017
AE Digital Projects | April 2017 Digital Kit
Hey friends! Today I wanted to quickly share a couple of projects I created using the fun April 2017 Digital kit from Ali Edwards. It's full of printable journal cards, digital stamps (great for putting on photos or cutting on your Silhouette), and digital embellishments!
I created two projects. The first is a spread in my 6x8 Project Life® album. Kept it super simple. Mostly words + photos. I added a few digital stamps and some journaling to some of my photos before I printed them.
This week was full of gorgeous photos of blue skies! It makes me happy to look at it. I stamped the date directly below the April Stories digital stamp and love the way those large Elle's Studio stamps turn out every time.
I needed just a bit of extra room, so I added a flip up pocket from Simple stories to include another photo and more journaling.
The second project was super fun to create. It's an 8.5 x 11 hybrid scrapbook layout where I incorporated a fun technique using a floral wreath included on one of the digital journal cards.
I have a tutorial on how to separate the wreath from the card and add a photo to the middle in the video below!
I added some stitching around the wreaths and used the Easter Joy digital stamp as a cut file for my title.
I added a little word sticker to each photo and some handwritten journaling and called it done.
I hope that you'll check out this digital kit - it's been one of my favorites so far!
Thanks, as always, for stopping by!
I created two projects. The first is a spread in my 6x8 Project Life® album. Kept it super simple. Mostly words + photos. I added a few digital stamps and some journaling to some of my photos before I printed them.
This week was full of gorgeous photos of blue skies! It makes me happy to look at it. I stamped the date directly below the April Stories digital stamp and love the way those large Elle's Studio stamps turn out every time.
I needed just a bit of extra room, so I added a flip up pocket from Simple stories to include another photo and more journaling.
The second project was super fun to create. It's an 8.5 x 11 hybrid scrapbook layout where I incorporated a fun technique using a floral wreath included on one of the digital journal cards.
I have a tutorial on how to separate the wreath from the card and add a photo to the middle in the video below!
I prin
I added some stitching around the wreaths and used the Easter Joy digital stamp as a cut file for my title.
I added a little word sticker to each photo and some handwritten journaling and called it done.
I hope that you'll check out this digital kit - it's been one of my favorites so far!
Thanks, as always, for stopping by!
Saturday, March 25, 2017
AE Digital Projects | Eat Story Kit®
Sometimes you just have to tell a story about who you are. Or who you're not. And it doesn't have to be complicated. This month's Eat Story Kit® inspired me to tell a story about how I'm not a baker. Or a cook.
I thought it would be fun to use the "Food for the Win" digital stamp (from the digital Story Kit®) on my photo and crop it into a circle. I also made it look like the words from the stamp go behind the rolling pin by strategically erasing portions. (shown in the process video!)
I cut some of the cards from the physical kit into circles and mixed them in with other circular elements of the kit. Love bunches of circles. Always.
I also added in a few word stickers from the Word Sticker Bundle in black and white and then put some drops of black ink as a final touch.
You can watch the whole thing come together in the process video!
Thanks so much for stopping by. I've linked to all available products below, except for the Ali Edwards products which are linked throughout the post.
Happy weekend!
Monday, March 13, 2017
AE Digital Projects: March 2017 Digital Kit
The March 2017 Digital Kit from Ali Edwards is full of fresh, Springtime inspiration. I created two projects with it, one of which is 100% digital. That's something I haven't done in ages and I kind of really liked it!
I resized a digital card to 8.5"x11", added a photo + some text and called it good to go. Love how simple it was and it has a very editorial vibe to it, which I love.
I also created Week 07 of my Project Life® album (I'll show you Week 06 next week!) and I have a full video tutorial on how I created the digital elements and then the physical assembly of the spread.
This week, my friend and I went to Midway (a quaint little mountain town) for a couple of days, so I included a 3"x8" insert for more photos. I really wanted a 6x8 full size photo as well.
I added a lot of text + digital elements right on my photos and you can see all the ins and outs of that in the process video. :) Here are a few detail shots...
I added stapled puffy hearts from Freckled Fawn throughout the spread. It's really the only embellishment and I like keeping it simple.
Take a peek at the video to see how I created the shaped text on my large photo and how I added the other digital elements to my cards. You can find this awesome kit in Ali's shop here. I've linked to all other available products below.
Thanks so much for stopping by!
SUPPLIES
(affiliate links)
Subscribe to:
Posts (Atom)