Showing posts with label process video. Show all posts

Friday, October 11, 2019

Altenew | October 2019 Stamp/Die/Stencil Release Blog Hop + Giveaway

Hey friends! It's time for another Altenew release + blog hop and there are so many things to love. I've created two projects, and I'll share the project without a process video first.

There are some pretty awesome string art dies in this release and I used the heart to add some fun detail to this intro for my 2020 6x8 Album that I call my "Whatever the Crap I Want" album.


I stamped images from the Wanderlust Stamp Set on the bottom of the page using Evergreen and Silver Lake inks and a little bit of Mountain Mist on the bottom. (Is anyone else geeking out about the fact that the ink names are all outdoorsy and fit perfectly with this set? Just me? Okay...)


Here's a closer look at that string art. I used white embroidery thread because I wanted the texture without a lot of visual weight.


I added the new 2020 Stamp Set in white on top of my photo and I love the way it looks. Because it's a 2x3 stamp set it has a great price-point and I think I could use it in my December Daily album next year as well.

The second project I created is a 12x12 layout and I was excited to share a fun foiling technique with you.


I used the new Truly Grateful stamp + die set to create these gorgeous flowers. One of the things I love about this set is the fact that it's a layering set with an outline included. Outline stamps work perfectly for the foiling technique I want to share with you (full tutorial in the video below).


I stamped the outline images using StazOn ink on the Heat Transfer Gold Foil and then traced the outline using the WeRMemory Keepers Freestyle Foil Quill.

Guys. It's super cool.


I stamped the layers of the flowers and leaves after I did the foiling. The foil resists the ink, so it works perfectly!

Here is my process video where you can get a closer look at how I created this layout.


And here's another look at the final layout:


So, ready for the giveaway info? Yep. That's what I thought.

Prizes:
To celebrate this release, Altenew is giving away a $50 gift certificate to 6 lucky winners! Please leave a comment on the Altenew Card Blog and/or Altenew Scrapbook Blog by 10/16/2019 for a chance to win.


We’ll also draw a winner to receive a $20 gift certificate from the comments left on each designer’s blog on the blog hop list below. All winners will be announced on the Altenew blogs on 10/20/2019.

Jen Schow YOU ARE HERE

Good luck and thanks so much for stopping by!


Thursday, February 21, 2019

Altenew Live Your Dream Scrapbook Collection Release Blog Hop + Giveaway


Hello friends! I'm excited to be joining the blog hop for Altenew's newest release, the Live Your Dream Scrapbook Collection! If you're hopping along, you probably came from Kathleen's blog and next you'll head over to Zinia's (but I'll have the full hop list at the end of the post!)

Here's a little peek at the beautiful collection:


Our Live Your Dream Scrapbook Collection is a bright and elegant line that you can use to document any occasion. From the little daily moments, you want to remember forever to bigger milestones like parties and birthdays.

All of the products in this collection are very versatile and you can use them for many different projects such as 12x12 layouts, pocket scrapbooking, cards, home decor, and much more.  
This collection contains
  • 16 sheets of 12x12 double-sided patterned papers (2 of each/16 different designs)
  • 2 6"x12" sheets of puffy alphabet stickers (220 pieces)
  • 2 6"x12" sheets of chipboard stickers (38 pieces)
  • 2 6"x12" sheets of clear stickers (31 pieces)
  • 1 pack of wood epoxy buttons (20 pieces)
  • 1 pack of die-cut cardstock embellishments (32 pieces)   

I just love those colors and the artsy vibe! I created two layouts with the collection + a process video. The first features the gorgeous pink fade paper and came together in just minutes!


I used the chipboard, wood buttons, alpha, and die cuts. I also added in a few stamped leaves from the Indoor Garden stamp set!

The second layout came together fairly quickly as well and was inspired by the colorful circles found in the chipboard and die cut packs.


I embellished tone on tone (one of my fave things to do!) and also added in some florals from the Just Because stamp set that I heat embossed and then watercolored with my Altenew Watercolor 36 Pan Set. So pretty!

You can check out the process here video below!


To celebrate this release, Altenew is giving away a $50 gift certificate to 6 lucky winners! Please leave a comment on the Altenew Card Blog and/or Altenew Scrapbook Blog by 2/28/2019 for a chance to win. 6 winners will be announced on the Altenew blogs on 3/3/2019.

AND...if you'd like another chance to win a $30 gift certificate RIGHT HERE, please leave a comment on this post with your favorite thing from the new collection and I'll choose a winner on 2/28/2019!

Be sure to visit the other people on the hop for more chances to win!

Jen Schow <<<<


Thanks so much for stopping by, and good luck!


Wednesday, August 23, 2017

Collection Disconnection | Little by Little #5 - Hello Joy

Hello friends! After a long absence (sorry about that!), I'm back with another layout in my Collection Disconnection series. This is a series where I take a single collection (this time it's the Shimelle Little by Little line) and create 10 different layouts, pointing out my tips and tricks along the way.


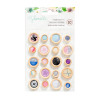
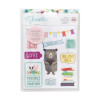
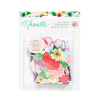
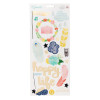
Today I wanted to share one of the ways I like to use up the extra bits and pieces from the sticker sheets and die cut packs that always seem to sit around in my stash. You know the ones I mean - the pieces that are cute but you have a hard time using them. They are different for each of us.

I created what I'm calling an "exploding photo mat" with all of those cute little bits that I'm at a loss for. And I love it!


I think the key here is to stick to a color palette - greens, blues, and yellow for me - and to let the interesting parts of the stickers and die cuts peek out from behind the photo. It doesn't matter what it actually is. It doesn't matter what it actually says. Just layer it in! Sometimes you have a few words that actually go with your story or theme...great! Put them on show!

After I layered all of that goodness, I added some journaling, a title, and a few intentional embellishments. I kept most of the focus right around the photo and didn't think too hard about it at all. In fact, this layout only took me about 30 minutes to complete. And that's fast for me! I also just noticed that this layout uses no patterned paper. What?! Yes. True. Wow.

You can watch it come together in the process video here:


I hope that you'll try adding an exploding photo mat to your next layout. Pull out all those glorious little die cuts and stickers that you've been holding onto and put them to good use!

I've linked to all available products below. Thanks so much for stopping by!


SUPPLIES
(affiliate links)

Wednesday, June 21, 2017

Collection Disconnection | Little by Little #2 - Magic Adventure

Hey friends! Welcome back for the second installment of my Collection Disconnection series where I take one paper line (Shimelle Little by Little) and create several layouts with different themes and color schemes and techniques.

Today, my intention was to be inspired by the inspiration behind the collection - children's books. And I was inspired to tell a story about reading, but I also decided to show you how I tackle the idea of using a bold and bright patterned paper for the background of your layout.


I find that the best way to make sure your photos stand out while still letting your bold pattern shine is to break it up with a solid color. I tend to gravitate toward white and in this case, I used notebook paper.


I combined a few words from the Thickers set to create my title, "Magic Adventure". I like that the title is white and I think if it were a different color it would compete with the background paper.


I pulled elements from the die cuts and sticker sheets to lend to magical, fairytale, getting-lost-in-a- good-book, feel and finished with a little bit of gold mist because, gold=magic.

You can see how it all came together in the process video!


I've linked to all available products below and don't forget to check out the other videos in this series on my YouTube playlist!

Thanks so much for stopping by!

SUPPLIES
(affiliate links)


Wednesday, June 14, 2017

Collection Disconnection | Little by Little #1 - Wild Wonder

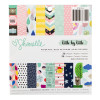
Hello friends! Today I'm excited to bring back a popular YouTube series I've done in the past - Collection Disconnection. This is a series where I take a single manufacturer collection and make 10 different layouts. The goal is to show you how to "disconnect" the collection and demonstrate ways you can make layouts using a single line look different from each other while showing you some fun tips and tricks along the way.


This time, I'm using the Shimelle Little by Little collection. If you didn't see it on my channel yesterday, I posted a video showing you the products I'll be using and how I store them. You can check that out here.

Today I'm happy to bring you the first layout, where I focused on using papers from the 6x6 paper pad and tried to use the icons I thought would be most difficult for me - the adorable animals!


I decided that the best thing to do would be to focus on the outdoors because animals are outdoorsy, right? I purposely chose a photo that didn't have a person in it because I think that half my problem using embellishments with faces is that they compete with the photo. No worries about that here!


I used three papers from the 6x6 paper pad to create a photo mat and one more (cut in half) to create a strip of pattern behind the running the length of the layout.

I also added in floral die cuts and leaves cut on my Silhouette Cameo (you can find those cut files in my shop here). I created a title from Thickers and the word "wonder" fussy cut from that awesome patterned paper - it's the only part of the layout where I didn't use my 6x6 pad!

Of course I sprinkled in a few puffy stickers and other embellishments. You can see the whole process in the video below!


Be sure to check back next week for another layout using the Shimelle Little by Little collection!


SUPPLIES
(affiliate links)