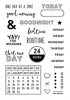
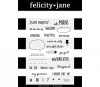
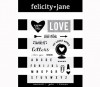
Hello! Since I finished up my Stamping in Scrapbooking series on my YouTube channel last week, I thought it would be nice to do a little roundup of tips or techniques you can use in your scrapbooking. Each photo is linked to the process video connected with it - just click it to see the video!
1. STAMP ON PATTERNED PAPER

This is a great way to make your stamps look like they are part of the paper and blend right in.
2. USE STAMPS IN PLACE OF DIE CUTS OR EMBELLISHMENTS

Stamped images work great as embellishments. Beautiful icons like this floral are great, but you can also make little tabs, labels, and banners out of word stamps like the "Monday Routine" label shown above. I think it helps to cut them out and layer them up to give them more dimension and interest.
3. CREATE A SHAPE OUT OF STAMPED IMAGES

You can see I created a circle or wreath-like look with these stamped leaves, but this could work with any larger stamps and in other shapes like hearts, stars, chevrons, etc.
4. CREATE AN INTERESTING BACKGROUND WITH A COMBINATION OF STAMPS

Using a combination of wheel stamps and textures in a few ink colors creates an interesting and appealing background.
5. USE ALPHABET STAMPS TO CREATE BOLD TITLES

Stick to a few fonts that compliment each other well. You can stamp directly to the background or stamp and cut them out to create a sticker look.
6. STAMP WITH DIFFERENT MEDIUMS

In the layout above, I inked up my stamps with some water-reactive markers, spritzed them with a bit of water and then stamped them for a watercolor look. You don't get a completely clear image, but you get an interesting look and when you use more than one color, they blend nicely.
You could also try stamping with paint, spray mists, gelatos, etc.
7. CLUSTER YOUR STAMPS TO CREATE A FOCAL POINT ON YOUR LAYOUT

In lieu of a patterned paper strip down the side of my layout, I added a bunch of stamped circles in rainbow order as a focal piece.
8. CREATE YOUR OWN PATTERNED PAPER WITH STAMPS

You can use word/phrase stamps or icons repeatedly on a piece of paper to create a pattern. This layout uses stamped paper in place of traditional patterned paper.
9. ADD INK/PAINT AROUND YOUR STAMPS USING MASKING FLUID TO PROTECT THE STAMPED IMAGE BELOW

This is a bit more of a fun technique than a tip. After I stamped the sketchy circle + words, I painted masking fluid over them, let it dry, added a bunch of distress ink + water, peeled up the masking fluid and the stamping stayed white and protected. This is one of those techniques with wow factor and a big reveal, which I love!
10. CREATE A STAMP EXPLOSION

Really didn't know what else to call this, but this is another fun technique. Basically, you paint with acrylic paint and then stamp with the same color ink so it looks like it's exploding from the paint. So fun.
Those are the techniques and tips I focused on in the videos, but here are a few bonus tips.
- Stamp with a few colors of ink on the same stamp to create an ombre or blended look
- Stamp the same image several times without re-inking for a variety of shades of one color and an interesting texture
- Overlap different colors of dye ink to create new shades
- Stamp in color to make your stamps blend in to your layout and in black to make it pop and look "stamped"
- Use your small stamps as a finishing touch or to scatter amongst your embellishments
- Color in outline stamps with watercolor, markers, or other inks/paints
- Give a little bit of interest to plain vellum by stamping - either with a quick drying ink or heat embossing
Hope that you've enjoyed my tips! If you entered last week's giveaway, check out the video below to see the lucky winner.