Hey friends! I'm exciting to (finally) be bringing you another series on my YouTube channel. I'm bringing back an old favorite - my Old Meets New Stash Kit series. And I'm really excited to work with the kit I created using both old + new products from my stash!
In this series I'll show you how I put the kit together (in the video below) and then create a new layout using the kit every Wednesday for 10 weeks, which will be posted here on my blog and on my YouTube channel.
Here's a closer look at what I chose to work with:
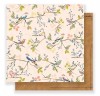
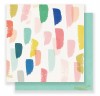
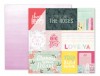
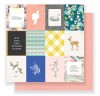
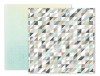
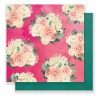
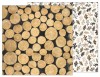
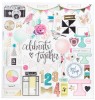
Papers
I chose a soft color palette but added in some rustic and earthy tones to ensure that I can create Autumn layouts with this kit as well.
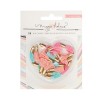
Embellishments
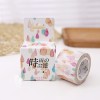
I started this kit with some peach label stickers and some mini tassels and added to it from there. I used the patterned papers as a guide for color choices, but also included some older items I've been wanting to use. That raindrop washi tape was a last minute addition - isn't it gorgeous?!
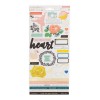
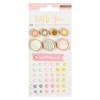
Stickers
I usually choose two alphabets, but here I included three. Couldn't help myself. I also included some new Maggie Holmes Gather stickers and some older Maggie Holmes chipboard that I want to get used up. I think it's important to use a mixture of new things that make me excited to create and older products that I still love.
Stamps
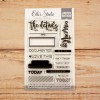
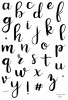
I love stamping, but often don't utilize them enough. I included two in my kit - a really versatile one from Elle's Studio and a new alphabet that I designed for Felicity Jane.
I created a blog post last year when I did my first stash kit series with 10 tips on creating your own kits. I think the information still applies and you can find it here. You can find a video where I put together that kit and go into detail about my choices on my YouTube channel here.
I've linked to all available products below. Please let me know if you have any questions and I'll see you next Wednesday with my first process video using this kit!
I get asked about how to make scrapbook process videos frequently. It's hard to believe that just over a year ago, I was the one asking those questions! A year has taught me a lot about making these videos and I wanted to share a bit of that with you.
If you want to take a peek into my space and a quick walk-through of the products I use, watch the video below or over on my YouTube channel. I've also linked to the products at the bottom of this post.
I also wanted to share a few random tips/facts about making these videos, so here you go...
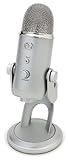
You don't need anything too fancy to get started. I use my iPhone to film my videos and a very inexpensive gooseneck clamp to hold it. Windows Movie Maker and iMovie are free video editing softwares that work great! Again, I've linked to the tools that I use below.
Have good lighting. I will admit that I am still unhappy with my lighting situation, but it's much better than what I started with. If you are able to, use natural light. If not, get some good lamps with natural light bulbs. I use Ott Lites.
It takes a lot oftime and effort to make these videos. I think it's worth it. Now that I've been doing this for a year, I've got it down to a science. It still takes time. Let me break it down for you.
1 hour: Making the layout
10 minutes: Taking photos of the layout
20 minutes: Editing photos of the layout
10 minutes: Transferring the videos from my phone to my computer
30 minutes: Editing the video (This could take more or less time, depending on how much editing I do. If I'm just speeding up the clips, adding my photos to the end, and doing a voiceover, I can do it in about 20-25 minutes.)
30 minutes-1 hour: Uploading the video to YouTube (Again, this can take more or less time depending on the internet connection speed and how long the video is)
So you can see that it takes roughly 2 1/2 hours from start to finish and that is with a lot of
experience. If you batch process, you can seriously cut this time down. What I mean is, if you
have 3 layouts for the week, create all of the layouts, photograph all of the layouts, then edit all
of the layouts, etc. It cuts down overall processing time.
Be yourself. People love connecting with other like-minded people. I love seeing a little personality in my favorite YouTubers. But, you also need to...
Provide valuable content. Think about what you have to offer. Are you a great teacher? Are you a great designer? Do you have a passion and enthusiasm for creating? Are you the funny one? What makes your videos something that people want to watch? Find that. Do that. It is what keeps people coming back. And just so you know, entertainment is most definitely value.
There is an awesome community here to support you. We got your back! When I first started doing videos, I was part of the nicolejones911 Facebook group and everyone there was very encouraging and helpful about making videos and giving me feedback. I really appreciated it. Which leads me to my final thought...
No one expects you to be a pro right from the start. So don't expect if of yourself. Allow yourself to be a beginner. Everyone has to start somewhere, right?
I hope that these tips and this video has been helpful to you. If you have any questions, feel free to leave me a comment below. And if you don't already, I strongly encourage you to join some scrappy Facebook groups. You can get immediate feedback and create friendships. I mentioned the nicolejones911 Facebook group, but these are also great: Scrap Gals Community, faith hope washi, Victoria Marie FB Group, Scrapaholics Anonymous.