Tuesday, April 25, 2017

AE Digital Projects | April 2017 Digital Kit

Hey friends! Today I wanted to quickly share a couple of projects I created using the fun April 2017 Digital kit from Ali Edwards. It's full of printable journal cards, digital stamps (great for putting on photos or cutting on your Silhouette), and digital embellishments!

I created two projects. The first is a spread in my 6x8 Project Life® album. Kept it super simple. Mostly words + photos. I added a few digital stamps and some journaling to some of my photos before I printed them.


This week was full of gorgeous photos of blue skies! It makes me happy to look at it. I stamped the date directly below the April Stories digital stamp and love the way those large Elle's Studio stamps turn out every time.


I needed just a bit of extra room, so I added a flip up pocket from Simple stories to include another photo and more journaling.


The second project was super fun to create. It's an 8.5 x 11 hybrid scrapbook layout where I incorporated a fun technique using a floral wreath included on one of the digital journal cards.


I have a tutorial on how to separate the wreath from the card and add a photo to the middle in the video below!

I prin

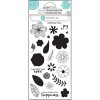
I added some stitching around the wreaths and used the Easter Joy digital stamp as a cut file for my title.


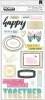
I added a little word sticker to each photo and some handwritten journaling and called it done.


I hope that you'll check out this digital kit - it's been one of my favorites so far!

Thanks, as always, for stopping by!


Monday, April 10, 2017

Elle's Studio | April 2017 Release + New Live Laugh Love Collection

Hey friends! So excited to share the April releases from Elle's Studio, including the brand new Live Laugh Love Collection!


I love the bright springy feel of this kit and I always love the super neutral cards as well. My faves from this month's releases are actually some of the extras - especially more puffy hearts and puffy alphas! Yay!!!


I created this layout focusing on the "Sights and Sounds" stamp set and the Puffy Heart Stickers.


I cut up a few of the cards from the kit for my title and a pop of color and kept it very simple. I was also super happy to use that grey striped paper from the new Live Laugh Love collection which is also available now! So many good things about this collection. These are a few of my faves - 6x6 Paper Stack, Puffy Stickers (always with the puffy stickers), and the Bits & Pieces.


I have an unboxing video of the April kit, all the extras, AND the Live Laugh Love Collection! 


I'll be sharing a process video later this month on my YouTube channel using more of these cute releases, so be sure to head over to my channel and subscribe if you haven't already and you'll definitely want to head to the shop at Elle's Studio to check out all of these pretty new products!

Thanks so much for stopping by!

Thursday, April 6, 2017

Tim Holtz + Tonic Studios Stamp Platform | Product Review


Hey friends! I was lucky enough to receive the new Tim Holtz + Tonic Studios Stamp Platform this week to test and try out (sent from Tonic Studios and Scrapbook.com, but the opinions are my own).

I was super excited and immediately said yes because I've been eyeing all of the stamp presses on the market and really liked what I saw demoed by Tim at CHA (I watched this video and this video on YouTube).

I had lots of fun playing with it and made a little video showing you all the details + a layout that I created using it.


I decided that the ways I will use this tool most is when I want to...

  • Double stamp - This could be to get a more solid image, to get a darker ink color, or for when I mess up! When using fineline images, it's really hard to get them lined up if you need to stamp it twice, so this tool will save you if you find you do that a lot!
  • Blend dye inks - I often stamp the same image in different colors on top of each other to create a shade that matches my embellishments or patterned paper, as shown in the video.
  • Stamp on the background of a layout - This is especially important to me when I decide to add stamping when a lot of the page is assembled already.
  • Ombre effects without ink contamination - I show this in the video as well, but it's really easy to ink up half the stamp with one color, stamp it (multiple times if needed) and then clean your stamp and ink the other half of the stamp with another ink color. 
Here is the layout I created using these techniques.


First, I created several flowers and leaves using a Hampton Arts stamp set (all available products linked below) and a few different ink colors to get the color I wanted.

You can get a good look at the fineline stamps on top of solid images. I stamped them three times so they would be dark enough and the lines are still clear. Love that!

I also decided to stamp my title on the background of my layout using an ombre technique. I also stamped the title several times and the lines are still crisp. The best. And I wasn't worried about messing it up on my half-completed layout.


Here's what I love.
  • The platform is 8 1/2 inches square with an open edge so you can definitely stamp anywhere on a 12x12 layout. Which is awesome for me.
  • The clear stamping swing arm thing is easily adjustable for clear stamps or rubber mounted stamps. Although I don't have any rubber mounted stamps in my stash anymore, I can see how this tool would be invaluable for double stamping if you use them often!
  • It's slim and fits on my desk easily!
If you're in the market for a product like this, I definitely recommend it! As I'm writing this blog post, it's not in stock on Scrapbook.com, but should be soon here and you can click "Notify Me" so you don't miss out!

Thanks so much for stopping by and let me know if you have any questions!